|
Step 1: Upload To Your Website
Download Modules Builder Lite ZIP file and extract it. Then, upload the files to your server using a FTP program. Learn how to upload module to server.
|

|
Step 2: Run Installation Wizard
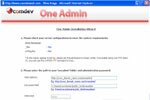
The first time when you run the oneadmin, it will automatically load the Installation Wizard. Run this wizard using appropriate information and settings in order to setup required MySQL Database and config file. Please visit Installation Wizard to view detailed guidelines.
|

|
Step 3a: Install & Run Custom Built Modules
After you have installed the Modules Builder Lite, login to your admin area and proceed to install your custom built module. Then, you can run the module to perform data entries at the back-end system or click on the 'Launch Builder' to update module's pages and functionalities with various page objects. |

|
Step 3b: Download Ready Made Modules
You can download modules' packages for free from our Modules Library. Simply select a module that you want and download the ZIP file into your PC. Then, install it on your Modules Builder Lite whereby you can update and manage module's forms and pages through the back-end system or 'Launch Builder' section.
|

|
Step 4: Integrate Modules To Your Website
Integration is easy. You just need to copy the appropriate inclusion code of a module and paste it on your HTML code. Read integration guidelines.
|
|
|
Shop with Confidence


|
| • |
Risk Free Trial |
| • |
Free Installation |
| • |
Cost Saving Discount |
| • |
24/7 Secure Ordering |

|
FREE download modules packages, install them and customise features.
Click here >>>
|
|