eCommerce > Documentation > Back-End Tutorial
First, browse to the URL of your back-end system for e.g. ' http://domain-name.com/oneadmin/ '
Then, proceed with your Administration Login using your username and password otherwise click on Return To Web Site or Forget Password.
|
 |
- After you've login to your admin area, proceed to your eCommerce or click on the 'Admin' > 'Installation' if your eCommerce is yet to be installed.
- Next, click on 'Product Catalog' > 'Add Product'. Choose the product category and enter the product code if any.
- Select product's Main Category or select Additional Category if you intend to display the same product under different categories.
- Insert your product's thumbnail (120 to 200 pixels) and the enlarged photo (300 to 500 pixels) in JPEG and GIF format. Otherwise, check the Auto-Thumbnail Creation and Auto-Image Resizing. (Note : If you choose Auto-Thumbnail, leave the Thumbnail column blank.)
- Enter your product prices and write a brief description about your product. Use HTML editor to enter product description in detail.
|
 |
- Customize the Quantity In Stock and Minimum Order Amount of the product. Define the product weight in kilogram if any. You can also Hide the product from public viewing.
- Set product as New, Featured product, or Taxable option to be displayed in your front-end. Select Recommended Category for cross-selling product. Once you've completed, click on Add.
|
 |
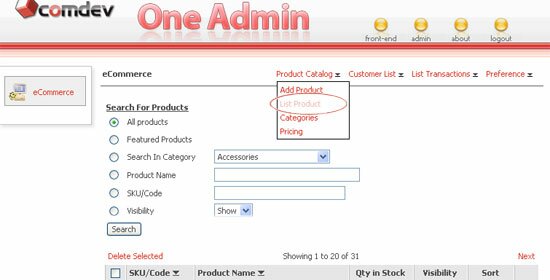
- To view your entire products, go to the 'Product Catalog' > 'List Product'. Click one of the search option to search by category, product name or product code and click Search.
- You can define the sequence of the products to be displayed on your web page, view Quantity In Stock and hide products from the public viewing.
- To edit a product, click on the
 icon. You will be able to see the product details similar to Add Product form. Update your product info in just a click away. icon. You will be able to see the product details similar to Add Product form. Update your product info in just a click away.
- Remove a product from the list by clicking on the Delete button or delete multiple item in the List Product page.
|
 |
- This option is used when there is a new sub charges incur and you may customize this option in your edit product page. Click for a specific product, and go to the product Sub Charges option.
- Enter Existing Option Class or Create New (eg. Size, color, model), insert Message that will display to customer, enter Option Value and select Sub Charge option either charge additional fee or minimize cost at reduced rate.
- Select Yes to display the product option in your front-end. Click on Add once you're done.
|
 |
Insert your product reviews and it will be displayed in your front-end. Also, edit reviews from customer and update them at instant. |
 |
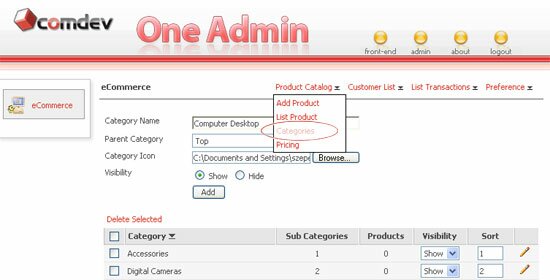
- Create multi-level of product categories by clicking on the 'Product Catalog' > 'Categories'.
- Enter the new Category Name. Choose a Parent Category, browse and upload category icon if any. Select Hide/Show category in the front-end and click on the Add button.
- Define the sequence of the category accordingly. You can always set the visibility from show to hide or vice versa
- For editing, click on the icon. Make changes on the info and click Update. To remove category(ies), simply click on the Delete button.
|
 |
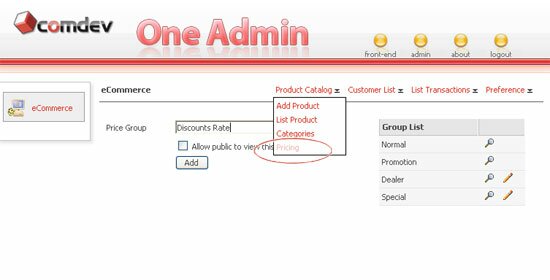
- Go to the 'Product Catalog' > 'Pricing', to manage your products prices. There are 2 price groups named 'Normal' and 'Promotion' which were created by default.
- Create a new price group, for eg. Discounts Rate. Check the box below the text field to allow public to view this price. Then click 'Add'.
- To Edit price group, click the icon corresponds to the record you want to edit. Make changes on the record and click 'Update'.
|
 |
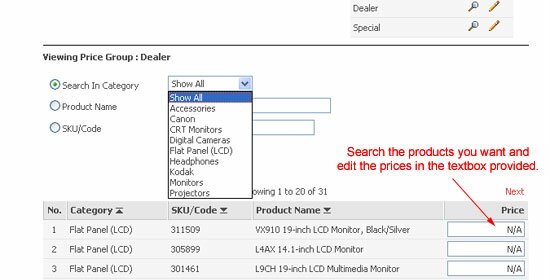
- To view record details, click on
 icon on top. A list of products will display along with prices. To shorten the list, you can search either by category, product name or product code. Then click 'Search'. icon on top. A list of products will display along with prices. To shorten the list, you can search either by category, product name or product code. Then click 'Search'.
- From the search result, you can update the price for each item in the textbox provided. When you are done, click on 'Update Prices' button.
|
 |
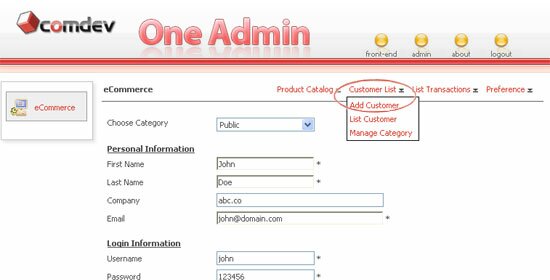
- To add a customer, go to the 'Customer List' > 'Add Customer'. To begin, choose a category to place the customer under a specific group. Enter his/her personal info, create user login info. in order to access specific Product Pricing page(s) and select the account status as Active.
- Enter the billing address and shipping address of your customer. Once you're done, click on the Add button.
|
 |
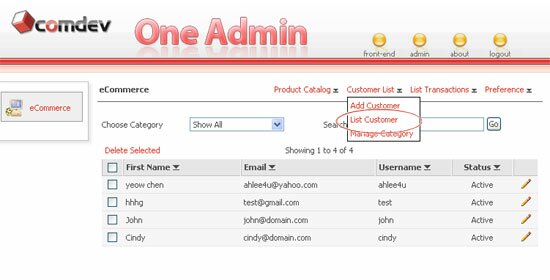
- To view all your customers, go to the 'Customer List' > 'List Customer'. You can shorten the list results base on the category or search by first name. Click on the
 or or  to sort the list in descending or ascending order. to sort the list in descending or ascending order.
- Click on the icon to edit customer records. Click Update to save changes. If you wish to cancel editing, click Back.
- To delete, you can either delete records from the Edit page itself. To delete multiple records, go back to the Customer List, check the box of whichever record you want to delete and click Delete Selected.
- Click Next to edit the following records.
|
 |
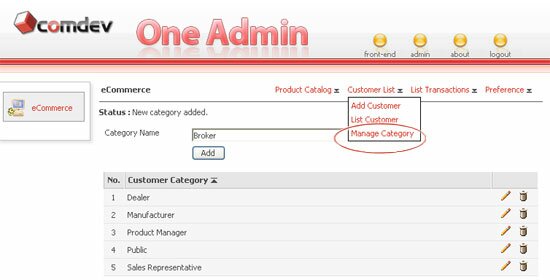
- To add category, go to the 'Customer List' > 'Manage Category'. Enter a new Category Name and click on the Add button.
- Click the or icon to sort list. Click on icon to edit a category. Edit the category and click Update to commit changes.
- If you wish to cancel editing, click 'Back'. To remove record, click 'Delete' right away on the same Edit page. To delete multiple records, go back to the category list and delete selected records.
|
 |
- This option is located under the Tools and it is used to keep a record of all taxable Countries and Zones.
- To add a Country Name, easily browse to the specific Zone that you've created earlier.
- You are able to view the entire list of records you have created by clicking on the and edit them in just a click.
|
 |
- Click on the 'Tools' > 'Tax Zone' to create Tax Information such as Tax Name. Select Zone(s) Name that you intend to tax.
- Define tax Rate in percentage. (Note : Taxes that applied to a zone will be multiplied)
- Once you're done, click on the Add button. Created tax information will be displayed in a list and you can edit the Rate in the textbox and update it at instant.
|
 |
- This page enables you to define table-based shipping charges, on total weight of the items purchased. 'To this value' must be higher than 'From this value'.
- To set a fixed shipping charges when weight total over a set value, for example weight > 50kg, check the 'Apply fixed shipping cost' box, enter 'when weight over (0.00)': 50.00 and enter a fix charge.
- You can add a handling fee to the shipping charges calculated by the system. This is a flat charge added to the shipping cost and is most useful when extra fee incurred, like packaging, insurance and etc, and you need to add some additional charges.
|
 |
- Giveaway Discount Coupon to your members during promotional period. To personalize Discount Information, click on 'Tools' > 'Discount Coupon'
- Enter your Coupon Code, define Discount rate in percent, choose Unlimited Usage Limit otherwise define number of times the coupon can be used.
- Also, select Valid Period options either it is Unlimited or set coupon expiry date.
- Created coupons, will be displayed on the list, you can edit the discount rate at your preference or click on icon to edit discount info.
|
 |
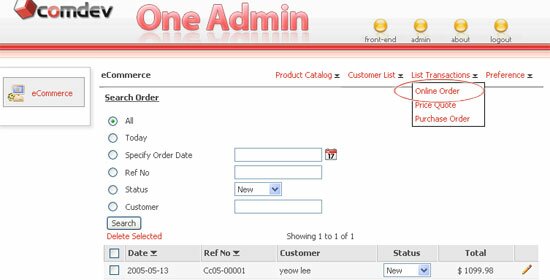
- All transactions made by customers in your front-end will be housed in your back-end system. To view the entire transaction, click on 'List Transaction'.
- Perform search using different criterias to narrow your search on specific orders such as Payment Method, Ref No, Status, etc.
- Once you hit on the Search button, all orders will be displayed in the list, from the list you can update orders Status either it is New, Close, Shipped or Replied.
- To remove orders from the list, click on Delete Selected once you select specific orders. Click on icon to edit orders info.
|
 |
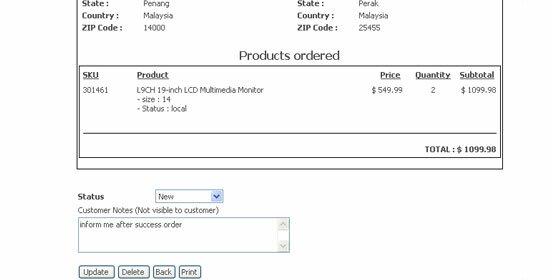
- Upon clicking on the icon, above page will prompt to you.
- Edit and update the orders info made by your customers such as Ref No, Date, Order Status, Payment Method, customer Company, Name, Email, Shipping and Billing Address, etc.
- You can enter an important message in the Customer Notes if any and enter Merchant Notes which will not visible to customer.
|
| Payment and Currency - Select Authorized Retailer / Payment Gateway |
Back to the top
|
 |
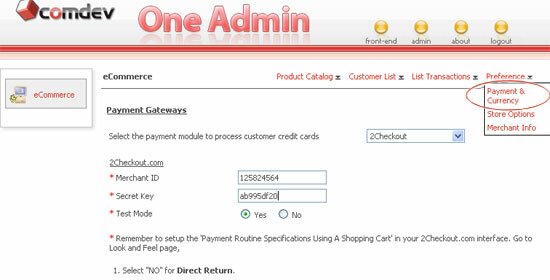
- Select Your Authorized Retailer Or Payment Gateway Service Provider such as the Authorize.NET, 2Checkout, CyberSource, LinkPoint, Paypal, and WorldPay
- Follow the instructions provided to guide you through the whole configurations and settings after you have chose one.
|
 |
- Select an online and various offline Payment Methods. Check on the box adjacent to each methods such as enable Cheque Payment, Cash On Delivery, Phone Ordering, Wire Transfer, and others.
- Write a short description for each method in the textarea.
- Define the currency and symbol you want to use for your store. Click on Save button once you're done.
|
 |
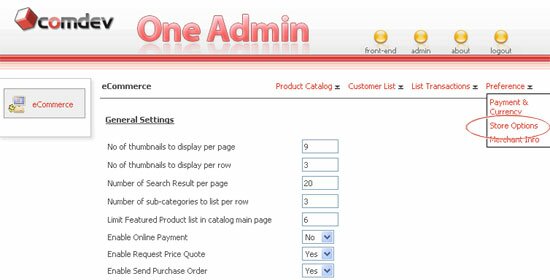
- Front-End URL - Enter the URL of your online catalog page
- Enable Static URL (Search Engine Friendly) - Run online catalog pages in static URLs and it can be applied on apache server with mod_rewrite enabled. Copy the given code to ecommerce/.htaccess file. (Note : .htaccess file can be found in the eCommerce folder which is not encrypted.)
- Enable Tax Calculation - Calculate Tax Base On Percentage or Flat Fee Of Amount Purchased and it can be applied to both Shipping Address or Billing Address.
- Enable Shipping Calculation - Calculate Shipping Cost Based On Total Price or Total Weight in Unit (kg, lb).
- Enable Image Validation Code - To display a random text image verification on your Sign Up form.
- Enable Discount Coupon - To display the Discount textbox in your front-end to enable your customers to enter their discount code.
- Store Settings, Product Image Size, Product Details page - Personalize these options and display properties at your preference.
|
 |
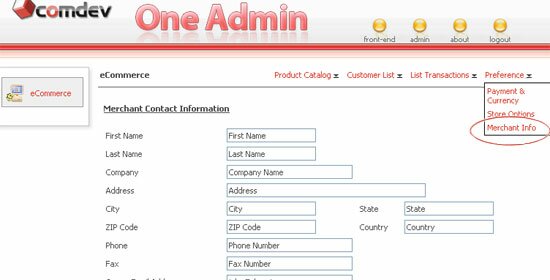
- Create your Merchant Contact Information and save it in your database.
|
 |
- Notification Emails will be sent out automatically when a user Sign Up or click on the Forget Password. Therefore, personalize the email subjects and contents at your preference.
- Also, notify Administrator when new member sign up, online orders made by customers, Request For Quotation, Purchase Order, or Other Payment Method which have been made.
- Customize your Main Page Content by displaying Featured Products, or enter your HTML code to display your own content.
|
|
|
| • |
Risk Free Trial |
| • |
Free Installation |
| • |
Cost Saving Discount |
| • |
24/7 Secure Ordering |

|
"Thanks you very much for your support. This is a very powerful pieces of software and is easy to use. And the support is superb. I am happy to be a client."
- Saul Alvarado, adicciones.org
|
|