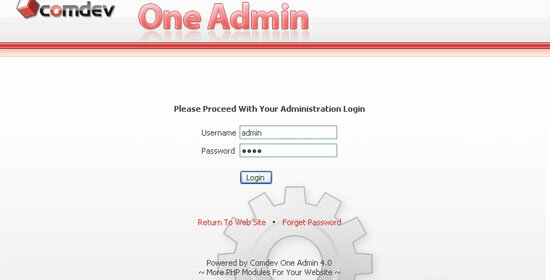
To proceed with your 'Administration Login', browse for the path to your 'Oneadmin' folder, for example 'http://your_domain_name.com/oneadmin/'.
Enter your username and password, and Click 'Login'. Click 'Return To Web Site' if you wish to return to the main page of your domain or click 'Forget Password' to retrieve your password.
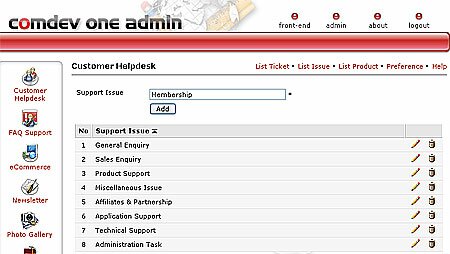
Click 'List Product' link on top. Enter your 'Support Product' to allow customer to choose product that relates to their issues.
Insert your product name and click 'Add'. As usual, sort product list using or icon beside each column label. Click icon to modify product name and delete a product by clicking icon.
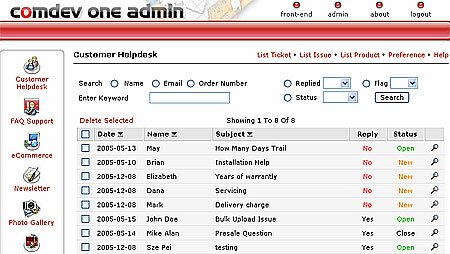
Click 'List Ticket' link above. All support tickets posted by customers are housed in this page. The list will show tickets status whether it is new, open or close.
To search ticket, simply check the radio button beside any search option, then click 'Search'. Or insert a phrase or keyword of support issue to fasten searching process.
By default, the list is sorted by 'Reply status = No' to indicate that the ticket has not reply yet. Click or icon beside each column label to sort dates, names and subjects in ascending or descending order.
In the list, click icon to view or reply a ticket. (We will show you the Reply page in next screenshot)
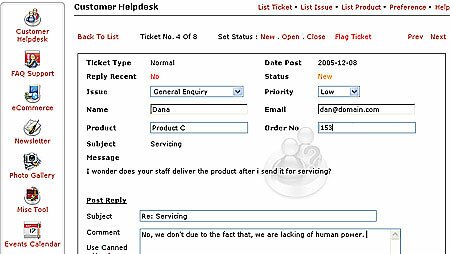
Use this page to reply your customers. It features your customer details as well as messages posted and messages replied.
To reply, use the preset subject or change to yours. Click on a canned message to insert repeated text, eg. Thank You, then write your message. Attach files to reply if any. Click 'Post'.
Now, the ticket status in the list will change to Open. If you wish to close the ticket, click 'Close', which is located on top of the page. Click 'Flag Ticket' to show the importancy.
Click 'Update' for changing your customer details if you wish to change after you've posted your reply. Click 'Delete' to remove ticket.
Navigate to other tickets using 'Previous' & 'Next'.


 or
or  icon beside each column label to sort list in ascending or descending order. Click
  icon to edit support issue and click
  icon to remove issue.
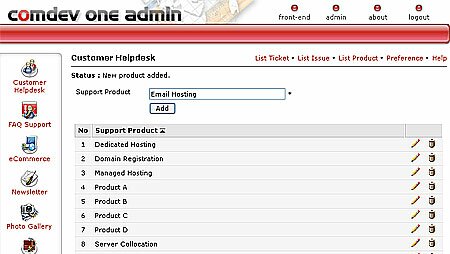
 icon to view or reply a ticket. (We will show you the Reply page in next screenshot)